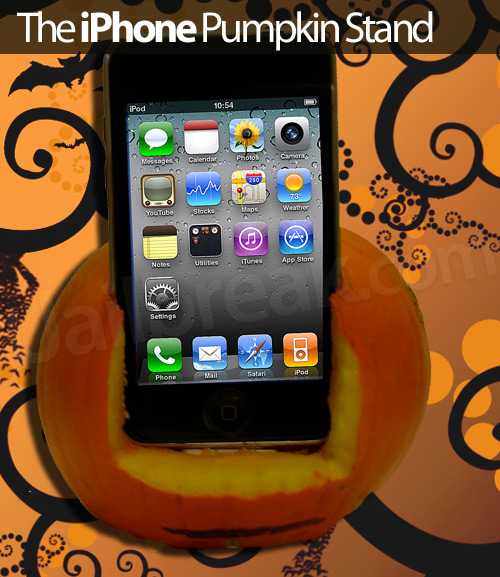
Halloween is today and if you are in the mood for carving something a little bit different this year why not consider making a pumpkin iPhone stand? In this how to guide from iJailbreak.com, we will show you how to create the web’s very first iPhone Pumpkin Stand. This iPhone Pumpkin stand not only looks unique for the Halloween season, but charges your iPhone as well! If you are looking for a cheap solution for an stand that works for both the iPhone/iPod Touch (also the iPad if you get a big enough pumpkin), the iPhone Pumpkin Stand is for you.
What will you need to create an iPhone Pumpkin Stand? Take a look at this quick list of items needed to create the iPhone Pumpkin Stand below…
What is Needed:
- One Small Pumpkin (Approx size – 4×5 inches) or larger if you are making on for your iPad
- One Sharpie or Permanent Marker
- One 12 Inch Ruler
- One Sharp Knife
Once you have the above necessities needed to make the iPhone Pumpkin Stand, you can follow the steps below.
Disclaimer: We are VERY aware that moisture is a concern here, and that is why we have dried out the pumpkin using an hot-air blow dryer. If you attempt this DIY iPhone stand, ensure that you completely remove any guts and dry the interior of the pumpkin. The iPhone pumpkin stand is not meant to be a serious stand, this is a fun activity you can do if you have some extra time on your hands that can act as a novelty item for a few days.
Creating An iPhone Pumpkin Stand
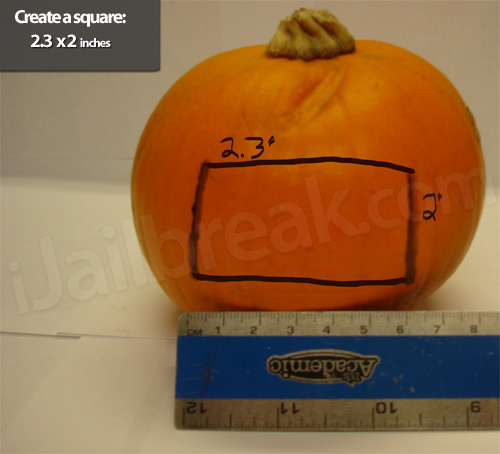
Step 1) – The first thing you will need to do is grab your Pumpkin, marker and ruler. You are going to need to measure out and cut a rectangle on the front of your pumpkin, that is approximately the length of your iPod Touch or iPhone. Note: Aim to draw a square that is approximately 2.3 x 2 Inches, as depicted below.
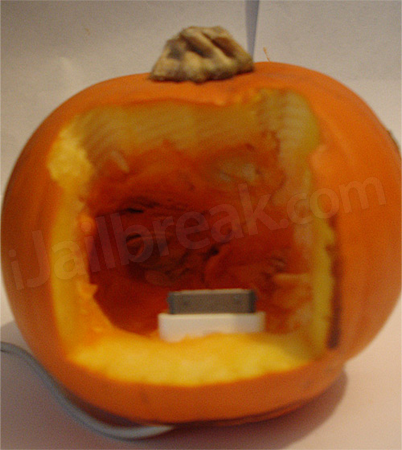
Step 2) – Now that you have drawn out a 2.3 x 2 inch rectangle on your pumpkin, you are going to need to cut this rectangle out. Try to be as accurate as possible when cutting out your rectangle. Once you are finished cutting out the rectangle you should have something similar to the image depicted below.
Important Note: Once you cut the hole, you will need to ensure all the guts and seeds are taken out. You will also want to wipe any moisture away with a paper towel. It is recommended that before you use the Pumpkin stand, that you let moisture inside the pumpkin evaporate (which can take anywhere for 24-48 hours). Leaving the pumpkin near a hot medium, will speed this process up.
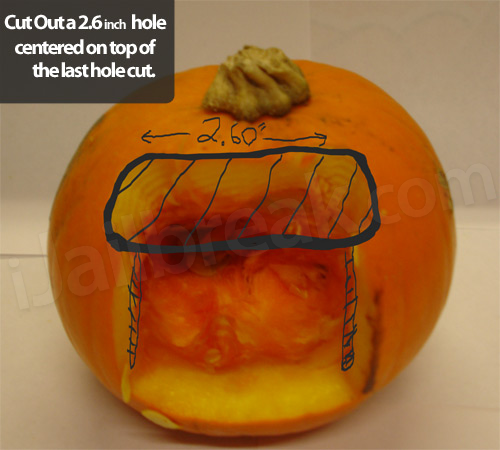
Step 3) – Now that you have cut out your rectangular hole,you are going to need to make another smaller rectangular hole on top of the hole you just cut out. This hole will be where your iPod Touch or iPhone will slide into. As your iPod Touch or iPhone needs to slide into this hole, you may also need to carve out small grooves shown below. You should make your second hole 2.60 x .75 inches and center it on top of your first hole.
This step is the most complicated, however this does not mean it is hard. Once you actually start cutting out the second hole, you will get what we mean. Below is another image of what your second hole should look like.
Step 4) – Once you have cut out your two holes, and have made some small grooves for your iPod Touch or iPhone to slide into. You are now at the stage where you will need to test out your Stand. Try sliding your iPod Touch or iPhone into the grooves you cut out (the second hole), if it does not fit then you will need to make the second hole wider or make your grooves deeper. You can also adjust the angle of where your iPod Touch or iPhone sits, by making the second hole larger in length.
Once you are happy with how your iPod Touch or iPhone sits in the Pumpkin Stand, you are done the actual stand. The next step is optional and is only required if you want to integrate your iPod Touch or iPhone’s USB cable into the stand (which we recommend doing). This way your iPod Touch or iPhone can recharge, while it is sitting in your Pumpkin Stand.
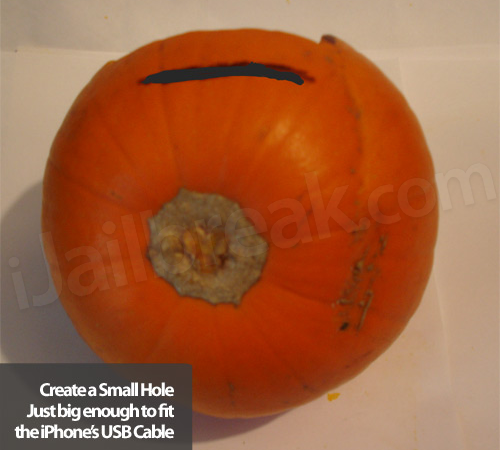
Step 5) – Now you are going to need to turn your Pumpkin upside down and cut a small hole that is the size of your iPod Touch/iPhone’s USB cable, approximately 1 Inch from where you cut your first hole. The idea is for the USB cable to come up through the bottom of the pumpkin and into the spot where your iPod Touch/iPhone sits. We suggest first marking this hole with your marker. You will also want to try to center this hole so it will match up with your iPod Touch or iPhone’s USB hookup.
Now once you cut the hole (ensure that you cut it so the hole goes up through the pumpkin), you can slide your USB cable into this hole. You should now have something like the image depicted below.
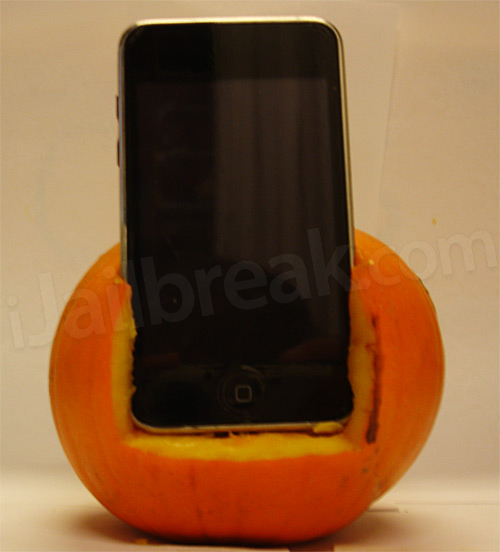
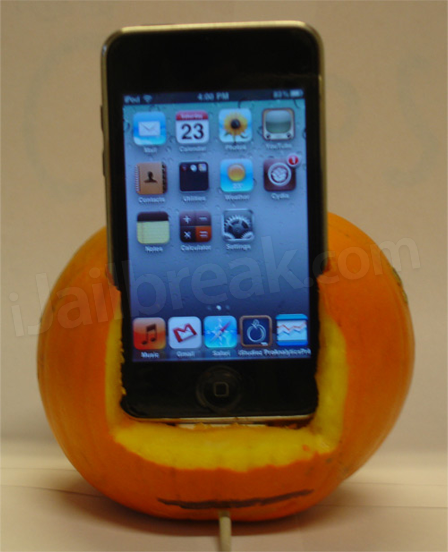
Now all that is left for you to do is test it with your iPod Touch or iPhone. Once you have fine tuned your stand, you have now finished your iPhone Pumpkin Stand! It should look something like the image depicted below.
We hope you enjoyed this how to guide from iJailbreak.com on creating an iPhone Pumpkin Stand! If you actually attempted to create an iPhone Pumpkin Stand, please share the final product in the comments section and we will create another post displaying these stands. We would love to hear all your questions and comments on the iPhone Pumpkin Stand!
Note: As noted before when this how to guide began – We are VERY aware that moisture is a concern here, and that is why we suggest drying out the pumpkin using an hot-air blow dryer. This is a novelty stand is something fun to do if you have the time.


Hello,
We are aware of the issues you bring up, and if you read the tutorial you will notice you warn you to only place your iDevice inside the pumpkin when the moisture has evaporated. We have put a lot of thought into this tutorial, we would never write something to harm your iDevice. While you may consider the idea stupid, others do not share the same opinion. I wrote this guide for those who want something to experiment with.I also know that this will not appeal to most users, but it is still a neat concept.
By no means do you have to do this, this is simply me sharing an idea. Thanks for commenting though, enjoy the rest of your weekend.
Cheers – StanHell
How much time does the moisture take to evaporate?
Because we used a blow dryer is took about 10 minutes (on a small pumpkin), if you let it dry naturally I imagine 24-48 hours.
this is just dumb (¬¬_)
really dumb
Done it, my iPhone now smells like pumpkin .-.