This tutorial explains the jailbreaking/unlocking process for both the iPod Touch and the iPhone. It will work with all generations running the 3.1 firmware up to the 3.1.2 firmware. Meaning this tutorial will work with the iPod Touch 1st Gen, iPod Touch 2nd Gen and the iPhone 2G, iPhone 3G and the iPhone 3GS.
**The iPod Touch 3rd Gen is supported but only as a tethered jailbreak at this time. This meaning that every time your iPod Touch 3rd Gen is rebooted or crashes you will need to plug it back into your computer.
**The iPod Touch models beginning with the model number MC will be a tethered Jailbreak.
**BlackRa1n now supports unlocking for the iPhone 3G and 3GS once jailbroken, click the BlackSn0w icon to unlock your iPhone.
This tutorial will update when necessary. Use at your own risk.
How To Jailbreak 3.1 – 3.1.2 Firmware
Jailbreaking the iPhone and iPod Touch is a fairly straightforward task, and if you follow this tutorial completely you should have no errors whatsoever. As always before we begin our tutorial we are going to review the proper requirements needed for your jailbreak to be successful. If you do not meet these requirements then your jailbreak will not work; follow the help instructions for more information…
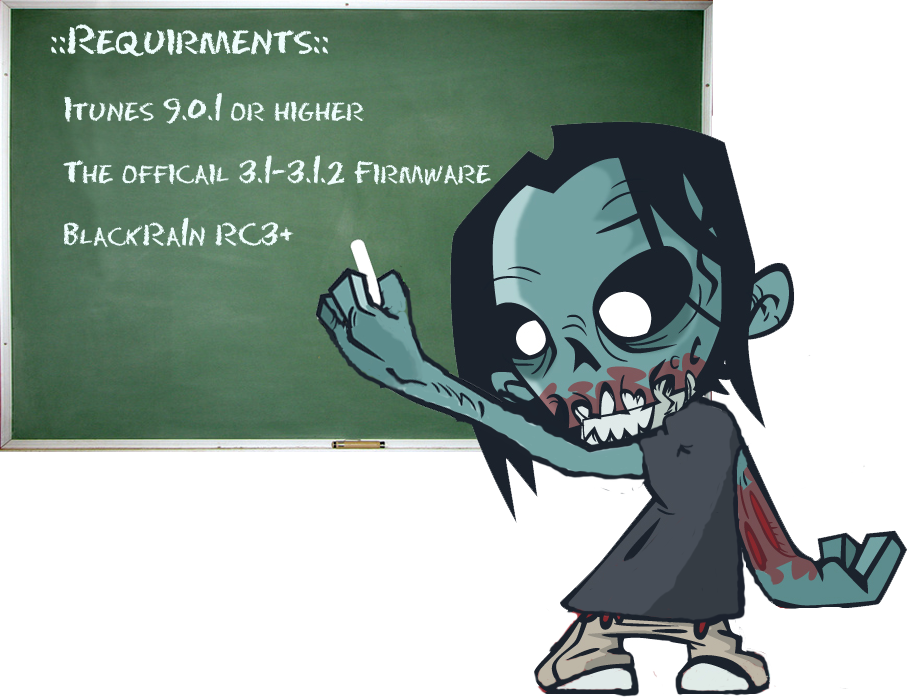
If you meet all the requirements above we are ready to begin jailbreaking our iPod touch and iPhone
Step 1) – The first thing we’re going to do is download the jailbreaking application called Blackra1n.

Once you click your designated operating system logo, click Save File.

Step 2) – When BlackRain is downloaded do not launch it yet! The first thing we are going to do is transfer blackra1n to our C:/ Drive or your Root Directory if you are on a Mac.
**Note: On Windows Vista a prompt box will appear saying you must provide Administrator permission to move this file. Just press continue and then press continue again when the second prompt box appears.

Step 3) – We are almost ready to begin jailbreaking/unlocking our iPhone, iPod Touch but before we launch BlackRa1n we are going to go into our Task Manager and disable a couple of iTunes Services to prevent any unnecessary errors. If you are on Windows press CTRL > ALT > DELETE, and once your task manager has been launched were going to disable the following services MDNS RESPONDER and ITUNES HELPER.
**Note: If you are on Mac you can skip this step.

Step 4) – With the services stated above we are now going to launch BlackRa1n. A dialog box will pop up saying are you sure you want to run this software press Run. With BlackRa1n launched we are going to plug in your iPhone or iPod Touch; if you haven’t already. (Sometimes I find the back USB ports on the back of your computer seem to work better with BlackRa1n. Obviously if you don’t have USB ports on the back of your computer don’t bother but if you do I suggest you use the back USB ports if you have them). Make sure your iPod is On and NOT off and also make sure iTunes isn’t running.

When you click the Run Button BlackRa1n should be up and running and look like the screenshot below…

Step 5) – We are now going to begin our jailbreaking/unlocking process! Click the Make it Ra1n button and the jailbreaking process will begin. You should see your iPod Touch, iPhone go into Recovery Mode and then you should see the BlackRa1n logo. If everything worked a message should pop up like the screenshot below saying your jailbreak is now finished. Give your iPod Touch, iPhone up to 5 mintues or more to reboot.

When you press Ok, you should be left with the screenshot below. You can now exit BlackRa1n and wait for your iPod Touch, iPhone to reboot…

Step 6) – When your iPod Touch, iPhone has rebooted you can now click the BlackRa1n app on your SpringBoard. You will have the following options; install Cydia, Rock and also BlackSn0w (if you are on an iPhone). Click install Cydia and its optional if you want to install Rock or not. Congratulations wait for you iPod Touch/iPhone to respring and your jailbreaking process is complete.
**Cydia is the default 3rd party installer, always install this. Rock is a more commercial installer that hosts mostly paid apps and themes installation is optional.

Click the BlackRa1n app on your SpringBoard and you should see the following…

When you are done installing Cydia and or Rock you can uninstall the BlackRa1n app by hitting the uninstall button.
Unlock iPhone 3G And iPhone 3GS
If you want to unlock your iPhone go back into the BlackRa1n app on your SpringBoard and click the BlackSn0w option. When you click BlackSn0w simply wait for it to unlock your iPhone then respring and you have just successfully unlocked your iPhone.

For iPhone 2G users wanting an Unlock
If you are running the iPhone 2G and want to unlock your iPhone, launch Cydia and type in BootNeuter into the search panel. When BootNeuter is downloaded apply the settings according to the screenshot below. When you have to settings like the screenshot below hit the flash.
**Note: this could take awhile please be patient and do NOT cancel this process under any circumstances. Once your iPhone 2G has been flashed you have now successfully unlocked it!

BlackRa1n isn’t as stable as RedSn0w so there are going to be many more errors you may experience. The number one rule here is keep trying and if your jailbreak fails switch USB ports and try again. It has taken me up to three tries for BlackRa1n to work, so persistence is key. Make sure you comment if you have any questions!
thanks a ton, i had my ipod touch 2g jailbroken on 3.0 then upgraded to 3.1.2 and would not have been able to rejailbreak without these instructions, thanks a ton
You are very welcome! I am glad this tutorial helped you out. If you need anymore help or have any questions feel free to contact me.
Hello Brett if you are new to the whole jailbreaking/unlocking scene i wrote a great introductory post that you can visit This Link Here. If you have an iPodTouch then unlocking wont do anything for you. Unlocking is only for users with iPhones, and what unlocking does is it allows you to use any carrier you choose instead of the default AT&T carrier (if your in US). If you want anymore help please feel free to contact me anytime or reply back to the comment! :)
wut all does it do to unlock i just got my 1st ipod touch dont know much bout them any help thanks
i want to learn how to unlock iphone 2g….
thankz tan i have my iphone unlocked
Hello Godz i’m glad this tutorial helped you unlock your iPhone. If you require anymore assistance please feel free to contact me anytime.
hello tan…why is it my ipod touch 2nd gen, if i turn it off and turn it on back it only appear on the screen was the connect to itunes sign? tnx & happy holiday….
Hello Godz your iPodTouch must not be a second gen. If your iPod says connect to your computer every time you turn it off that means it is a tethered jailbreak. You must simply re run blacka1n every time it turns off this will hopefully be fixed by the dev teams at a later date. This only applies to the New iPod Touch’s. When did you get your iPod Touch Godz?
last month..i dont what gen is it..do you mean tethered tan is a 3gen ipod touch? tnx
sorry for late reply tan…
Hello Godz if you got your iPod last month you have a 3rd Generation iPod Touch. This means that your iPod Touch is tethered when you jailbreak it. So every time your iPod Turns off you need to plug it back into your computer and run blackra1n again. Hopefully this will be fixed soon but because apple changed the bootloader on the newer generation iPod Touch’s and iPhone’s the exploit used before no longer works on these newer models. I hope this helps thanks! :)
thanks again tan..
hey there my wifi is not working(tried many others so finally decided) for that i want to restore my iphone..does jailbreaking will be sucessful..Without wifi