Reading the title of this post you may have already brewed a cup of your favourite coffee or beverage, pulled up a comfortable chair and are ready to be in it for the long haul. Well luckily, rooting your Amazon Kindle Fire is so simple that you will doubt yourself.
Thankfully Amazon stuck to their word and is allowing users to tinker and have access to the software running the Amazon Kindle Fire. So let’s not beat around the bush and get to work!
Before getting into the nitty gritty of it, you will need to access everyone’s favourite Android Developer Bridge or ADB. If you do not already have access, simply download it from here, and then you will need to add the Vendor ID for Amazon’s Lab126 (0 x 1949) to the dab_usb.ini file.

Step 1) – Go to %USERPROFILE%\.android , once you are there, edit the adb_usb.ini file and add the following line at the end:
0x1949
Then save and exit.
Step 2) – Go over to the area where you have installed the Android SDKopen the folder labeled google-usb_driver and locate the android_winusb.inf file, and add the following lines under the [Google.NETx86] and [Google.NTamd64] sections:
;Kindle Fire
%SingleAdbInterface% = USB_Install, USB\VID_1949&PID_0006
%CompositeAdbInterface% = USB_Install, USB\VID_1949&PID_0006&MI_01
Save and close the file. Now that is it, you are now done with the ADB part.
Now next thing to do is enable root access on the Kindle Fire:
Step 1) – Plug in your Kindle Fire to the PC (hopefully it is already plugged in since we did to the ADB hassle already).
Step 2) – Open the Device Manager from the PC, and under Other Devices you should see the Kindle Fire, now choose the android_winusb.inf file.
Step 3) – Enable installation of apps from Unknown Sources. You can do this by tapping the top most bar on your Amazon Kindle Fire and navigate to Choose More and head over to Device, you should see a listed device.
Step 4) – Download the SuperOneClick tool from here.
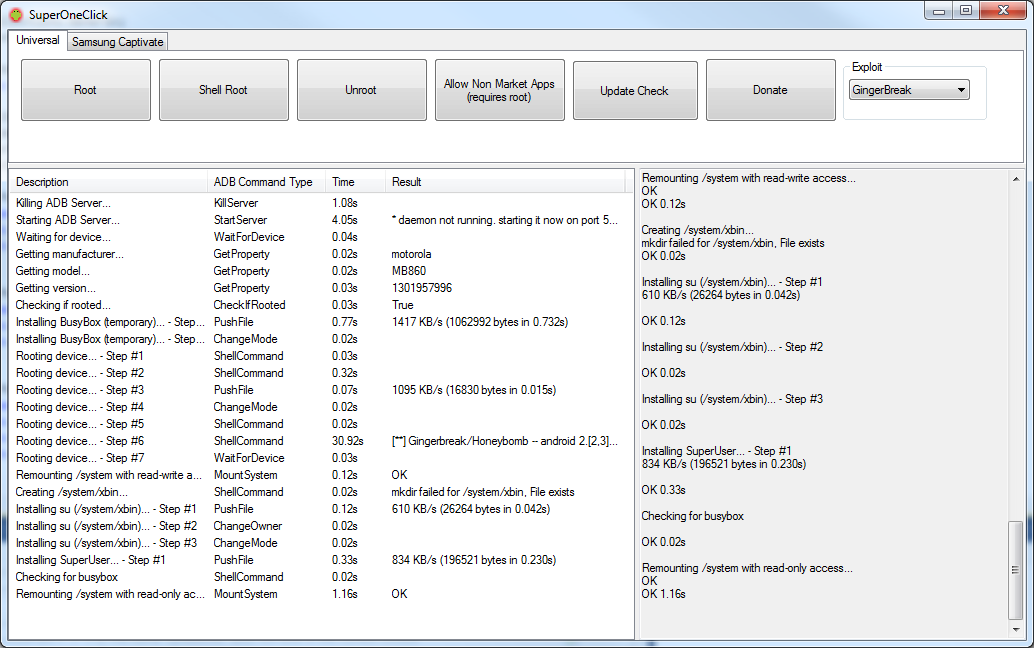
Step 5) – Run SuperOneClick and click on the Root button located in the top left corner, that is it! You have now rooted your Kindle Fire with complete Superuser access. If you are still scratching your head check out this screenshot.

In addition to allowing users to tinker and have access to the inner workings of their Kindle Fire, Amazon has also given everyone the green light for installing third-party apps onto the Fire. Just simply head over to Settings, and then Device, and turn on “Allow Installation of Applications”, hit ok when the warning box prompts you and voila!
Let us know how you are enjoying your Kindle Fire in the comments below.
I am really enjoying my fire! I rooted it and have got the google market running fine. My only gripe is that I have used two separate amazon accounts in my life. One exclusively for the amazon app market and the second to buy all my kindle books and real purchases. Does anyone know a way to have two authorized accounts on one kindle?
I see step 2 everywhere but I just do NOT understand what is
supposed to be done by “Choose the android_winusb.inf file” in this
statement “Navigate to Device Manager (Windows) and under “Other
Devices” find your Kindle Fire. Choose the android_winusb.inf file.”
Choose it from where?
KW
Yeah he’s right I did not understand that either!
where is the : dab_usb.ini file
coz i tried to search for it but i couldn’t find it anywhere ? any help please !!!
The point of Amazon’s content is to have it neatly stored all in one place. So no, there is no way to do what you’re asking because it was designed to be through one account.
After you have done the procedure. Do you have to do something else to access the google market. Does it just appear in the search or do we get an icon like google play ?
i think this sucks balls my kindle fd up now
need help with step 1